Garlic Herb Braided Bread
why make this recipe
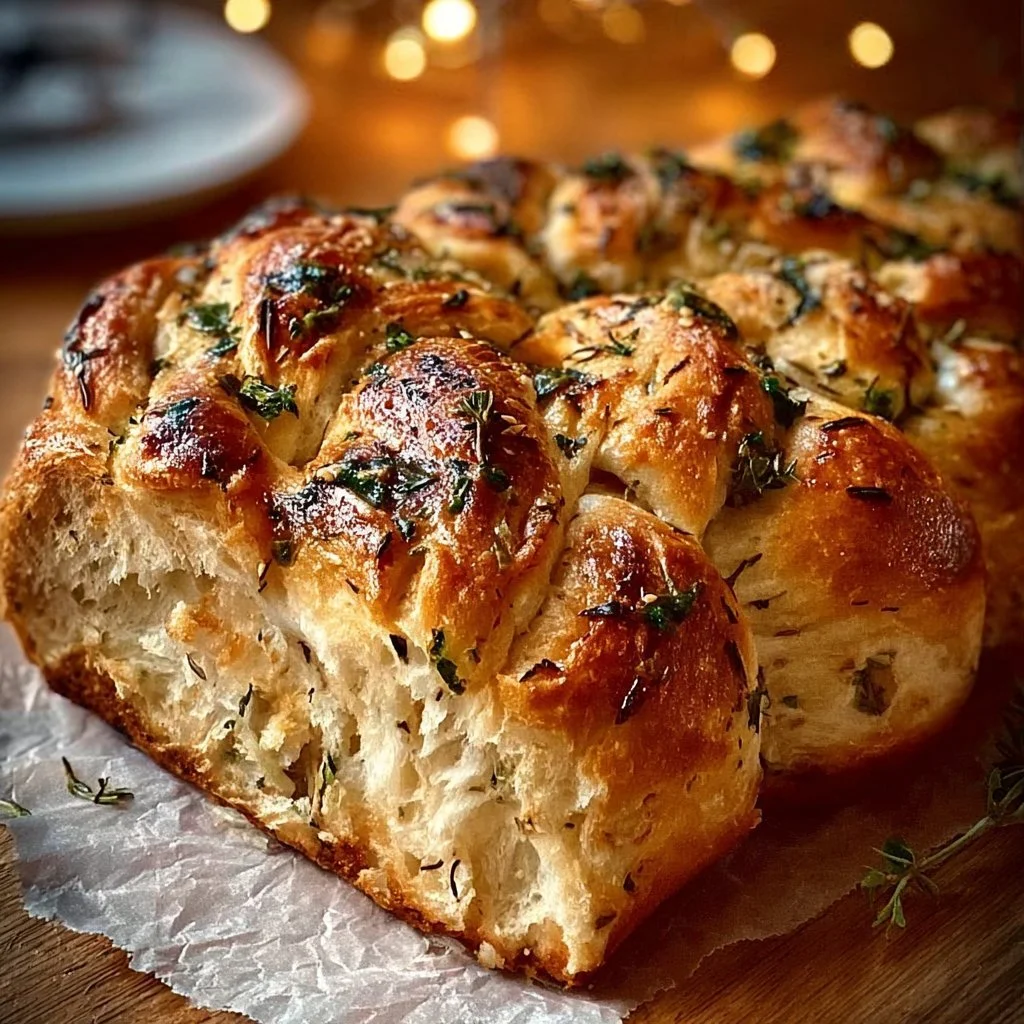
Garlic Herb Braided Bread is not just any ordinary bread; it’s a delightful experience for anyone who enjoys homemade food. The combination of garlic, mixed herbs, and Parmesan cheese gives this bread an amazing flavor that makes it perfect for serving at a family dinner, during holidays, or simply enjoying with a warm bowl of soup. It’s easy to make and involves steps that are fun for both beginners and experienced bakers.
When you make Garlic Herb Braided Bread, you get the satisfaction of baking something delicious from scratch. This can also be a fantastic way to spend time with family or friends. Kids will love getting involved by helping to knead the dough or braid the bread. This recipe is a wonderful blend of simplicity and flavor, making it a must-try!
how to make Garlic Herb Braided Bread
Making Garlic Herb Braided Bread involves a series of simple yet enjoyable steps. With a little bit of time and effort, you can create a stunning loaf that looks as good as it tastes. Let’s take a closer look at the ingredients and the step-by-step directions for making this delicious bread.
Ingredients:
- 2.5 cups All-Purpose or Bread Flour
- 2 teaspoons Active Dry Yeast
- 1 cup Warm Water
- 2 tablespoons Olive Oil
- 1 teaspoon Salt
- 1 tablespoon Sugar
- 3 cloves Garlic, minced
- 2 teaspoons Dried Mixed Herbs
- 0.5 cups Grated Parmesan Cheese (optional)
- 2 tablespoons Melted Butter (for brushing on top)
Directions:
1. Activate the Yeast
To get started, you need to activate your yeast. Begin by combining warm water and sugar in a medium-sized bowl. Stir until the sugar dissolves. Next, sprinkle the active dry yeast over the water mixture. Let it sit for 5-10 minutes. You should see bubbles form after a few minutes, showing that the yeast is active.
2. Mix the Ingredients
In a large mixing bowl, combine the all-purpose flour and salt. Create a well in the center of the flour mixture and pour in the activated yeast mixture along with the olive oil. At this point, add the minced garlic and dried mixed herbs. If you love cheese, feel free to mix in the grated Parmesan cheese. Stir the ingredients together until they form a rough dough.
3. Knead the Dough
Once the dough comes together, transfer it to a floured surface. Begin kneading the dough with your hands. Knead for about 8-10 minutes until the dough is smooth and elastic. You may need to add a little extra flour to prevent sticking. The goal is to develop the gluten in the bread, giving it the right texture.
4. Let It Rise
After kneading, place the dough in a greased bowl. Cover the bowl with a damp cloth to keep it moist. Set it in a warm place and let it rise for 1-2 hours. You want the dough to double in size. If your kitchen is cool, it may take a bit longer.
5. Shape the Dough
Once the dough has risen, punch it down to remove air bubbles. Divide the dough into three equal portions. Roll each portion into a rope about 12 inches long. Braid the three ropes together, pinching the ends to seal them. This braiding will give the bread a beautiful look.
6. Second Rise
Now, place your braided bread on a baking sheet lined with parchment paper. Cover it again with a cloth and let it rise for another 30-45 minutes. During this time, you can preheat your oven to 375°F (190°C). This second rise helps the bread become fluffier.
7. Brush and Bake
Before baking, brush the top of the braided bread with melted butter. This gives it a lovely golden color when it bakes. Place the baking sheet in the preheated oven and bake for 25-30 minutes. Keep an eye on it near the end; you want it to be golden brown and sound hollow when tapped.
8. Cool and Enjoy
Once the bread is baked, remove it from the oven and let it cool on a wire rack. This helps it set, making it easier to slice. After it cools, cut the bread into slices and serve. It’s delicious on its own or paired with dips, spreads, or a meal.
how to serve Garlic Herb Braided Bread
Garlic Herb Braided Bread is incredibly versatile. You can serve it in multiple ways:
-
With Soup or Salad: This bread pairs well with a hot bowl of soup or a fresh green salad. The garlic and herb flavors complement light dishes perfectly.
-
As an Appetizer: Slice the bread into bite-sized pieces and serve it as an appetizer. You can offer it with olive oil, balsamic vinegar, or a herbed dip for guests to enjoy.
-
With Dinners: This bread is perfect alongside pasta dishes or grilled meats.
-
As Sandwich Bread: Use slices to make great sandwiches, adding your favorite fillings between the slices.
No matter how you choose to serve it, this garlic herb bread will elevate any meal.
how to store Garlic Herb Braided Bread
To keep your Garlic Herb Braided Bread fresh, here are some simple storage tips:
-
Room Temperature: If you plan to eat the bread within a few days, store it at room temperature. Place the bread in a bread box or wrap it in a clean kitchen towel to keep it soft.
-
In the Refrigerator: You can refrigerate the bread to make it last longer, but it may dry out. If you choose to refrigerate it, wrap it tightly in plastic wrap or foil.
-
Freezing: For long-term storage, you can freeze the bread. Wrap it tightly in plastic wrap, then place it in a freezer bag. It should last for about 2-3 months in the freezer. When you are ready to eat it, thaw it in the refrigerator or at room temperature.
tips to make Garlic Herb Braided Bread
To help you make the best Garlic Herb Braided Bread, consider these helpful tips:
-
Measure Ingredients Accurately: Accurate measuring is crucial for bread-making. Use proper measuring cups and spoons for flour and liquids to ensure the right texture.
-
Activate Yeast Properly: Make sure your water is warm but not too hot, as high temperatures can kill the yeast. Always test the water temperature with your finger if you’re unsure.
-
Knead Well: Proper kneading develops gluten in the bread. This is essential to get that soft and fluffy texture.
-
Don’t Skip the Rises: Allowing the dough to rise properly is vital for good flavor and texture. If you’re in a hurry, find a warm spot, like near a sunny window, to speed up the rising process.
-
Experiment with Herbs: Feel free to customize the recipe by using different dried herbs like oregano, rosemary, or thyme, or even fresh herbs if you prefer.
variation
There are plenty of ways to mix things up with this Garlic Herb Braided Bread recipe:
-
Cheesy Variations: Add more cheese by incorporating mozzarella or feta in addition to Parmesan for a richer cheesy flavor.
-
Spiced Bread: Increase the flavor by adding a pinch of red pepper flakes or your favorite spices to the dough.
-
Olives or Sun-Dried Tomatoes: Incorporate chopped olives or sun-dried tomatoes into the dough for an added burst of flavor!
-
Sweet Twist: If you want a sweet bread, try adding cinnamon and sugar into the dough, and serve it with butter or jam.
FAQs
1. Can I make this bread without Parmesan cheese?
Yes, you can still make delicious Garlic Herb Braided Bread without Parmesan cheese. Just skip that ingredient and the bread will still have great flavor from the garlic and herbs.
2. Can I use whole wheat flour instead of all-purpose flour?
Absolutely! You can substitute whole wheat flour for all-purpose flour. Just note that it may result in a denser bread, so you might want to mix it with some all-purpose flour for a lighter texture.
3. How can I tell if my bread is done baking?
The best test is to tap the bottom of the loaf. If it sounds hollow, it’s done. The top should also be a nice golden brown color.
By making Garlic Herb Braided Bread, you create not only a delicious meal accompaniment but also a memorable baking experience that can be shared with family and friends. Enjoy every slice of this heavenly bread, and don’t hesitate to try out different variations! Happy baking!