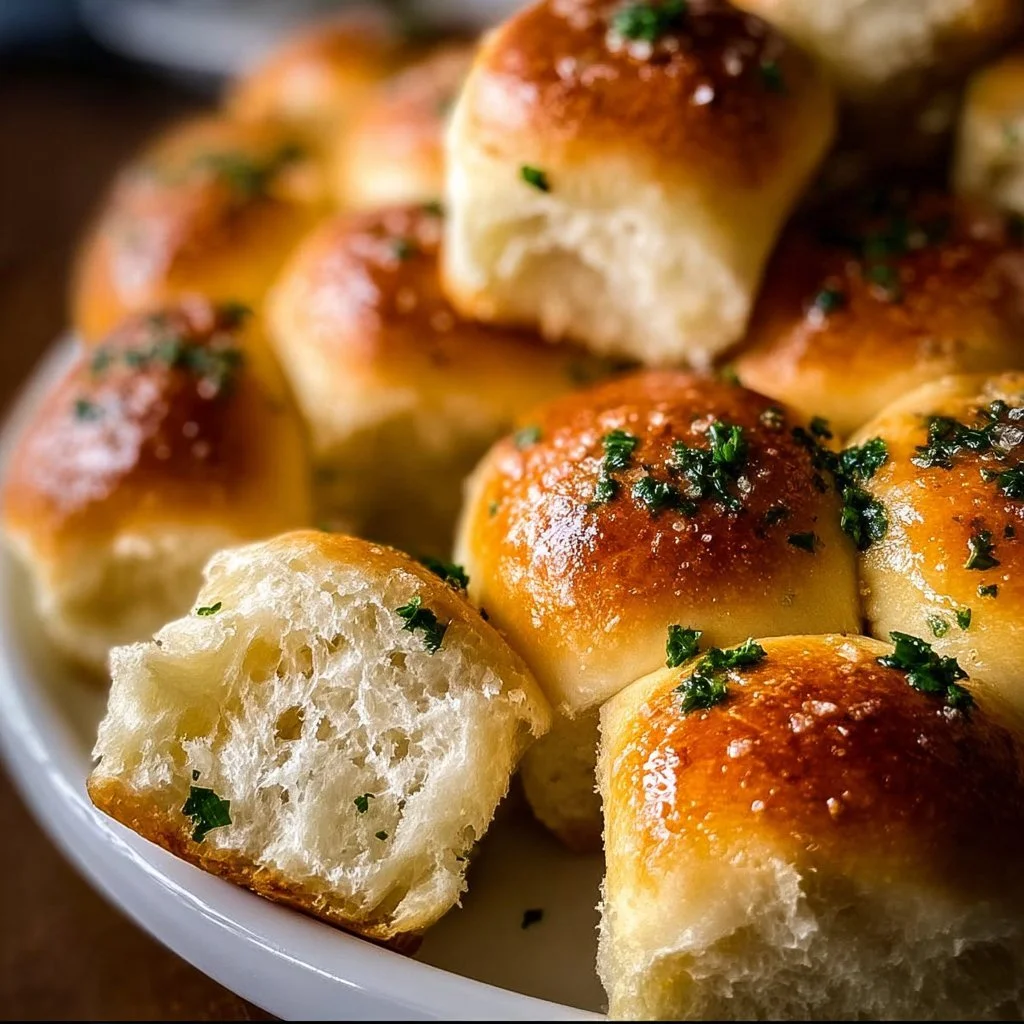
Garlic Bread Rolls
Why Make This Recipe
Garlic Bread Rolls are a delightful addition to any meal. They are not only delicious but also very versatile. Whether you’re serving them with pasta, soup, or as a snack, these rolls are sure to impress. The aroma of freshly baked bread combined with rich garlic and butter creates a mouthwatering experience that will fill your home with warmth and comfort. Making your own rolls also allows you to customize the flavors to your liking and ensures that you have fresh, soft bread at your fingertips.
Homemade Garlic Bread Rolls are perfect for gatherings and family dinners. They are easy to make and can be whipped up quickly, especially if you have the ingredients ready. Plus, they bring a touch of homemade goodness that is hard to beat.
How to Make Garlic Bread Rolls
Making Garlic Bread Rolls is a fun and rewarding process. It begins with the simple act of combining some basic ingredients and ends with a batch of golden, buttery rolls that are ready to be devoured. Whether you’re a beginner or a seasoned baker, this recipe provides clear steps to create delicious garlic rolls that everyone will love.
Ingredients
- 4.5 tablespoons Unsalted Butter
- 2 tablespoons Minced Garlic
- 3.5 cups All-Purpose Flour
- 3 tablespoons Chopped Fresh Parsley
- 1 tablespoon Granulated Sugar
- 2.25 teaspoons Instant Yeast
- 1 teaspoon Fine Sea Salt
- 1 cup Whole or 2% Milk
- 1 Large Egg
- Beaten Egg (for brushing)
- 2 tablespoons Unsalted Butter (for garlic butter)
- 1 tablespoon Minced Garlic (for garlic butter)
- 1 tablespoon Chopped Fresh Parsley (for garlic butter)
- Flaky Sea Salt (for finishing touch)
Directions
-
Gather your ingredients to ensure a smooth process. Measure out all your components before starting. This will help you stay organized and ensure you don’t miss anything important during the recipe.
-
Warm the milk to about 110°F. This temperature is warm enough to activate the yeast but not too hot to kill it. You can check the temperature with a thermometer or test it with your finger, ensuring it feels pleasantly warm.
-
Activate the yeast by mixing it with warm milk and sugar. Stir them together and let them sit until frothy. This typically takes about 5-10 minutes. You will know the yeast is active when it starts to foam.
-
In a large bowl, mix the flour, salt, and parsley. Create a well in the center for the yeast mixture, egg, and melted butter. The well helps to incorporate the wet ingredients more smoothly into the dry ingredients.
-
Knead the dough for 8-10 minutes. You can do this by hand on a floured surface or in a stand mixer with a dough hook. The dough should become smooth and elastic. Then, let it rise in a greased bowl covered with a towel until it doubles in size, which usually takes 1-2 hours.
-
Prepare the garlic butter by mixing melted butter, minced garlic, and chopped parsley in a small bowl. This mixture will give your rolls that extra mouthwatering flavor.
-
After the first rise, punch down the dough to release any air bubbles and shape it into 12-16 balls. This shaping is important for the final texture of the rolls.
-
Let the dough balls rise again on a greased baking sheet for 30-40 minutes. They will grow in size and become fluffy.
-
Preheat the oven to 375°F. This is the perfect temperature for baking your rolls to a beautiful golden brown.
-
Brush the tops of the rolls with beaten egg. This will give them a nice golden color when they bake.
-
Bake in the preheated oven for 15-20 minutes until golden brown. Keep an eye on them to ensure they do not burn.
-
Brush with the prepared garlic butter immediately after baking and sprinkle lightly with flaky sea salt. This step adds flavor and that finishing touch that makes your rolls irresistible.
-
Allow to cool slightly before serving warm. While they are delicious fresh out of the oven, letting them cool just a bit will prevent burning your hands and your mouth!
How to Serve Garlic Bread Rolls
Garlic Bread Rolls can be served in various ways. They are excellent as a side dish with pasta, soups, or salads. You can also enjoy them by themselves as a snack or appetizer. To elevate your dining experience, serve them alongside marinara sauce or a creamy dip.
These rolls are perfect for parties and gatherings, where guests can easily grab one and enjoy its fluffy texture and rich garlic flavor. You can even slice them open and add a bit of cheese for a cheesy garlic roll experience.
How to Store Garlic Bread Rolls
Storing Garlic Bread Rolls properly is essential to keeping them fresh. If you have leftovers (which is often unlikely!), allow the rolls to cool completely before storing them.
Place them in an airtight container at room temperature, where they will stay fresh for about 2-3 days. If you want to extend their life, you can wrap them tightly in plastic wrap and place them in the freezer. They can be frozen for up to 3 months.
To reheat, simply pop the rolls in a 350°F oven for about 10 minutes, or until warmed through. This will help them regain their soft and fluffy texture.
Tips to Make Garlic Bread Rolls
-
Use Fresh Ingredients: Using fresh garlic, parsley, and good-quality butter will enhance the flavor of your rolls.
-
Don’t Skip the Kneading: Proper kneading develops gluten, which is important for the rolls’ texture. If you have a stand mixer, use the dough hook for less effort.
-
Check Your Yeast: Make sure your yeast is fresh and stored in a cool, dry place. If it’s expired, the rolls won’t rise.
-
Experiment with Seasonings: Feel free to add other herbs or spices to the dough for different flavors. Rosemary or thyme can provide a nice twist.
-
Brush with Extra Garlic Butter: For an additional flavor punch, brush your rolls with garlic butter again before serving.
-
Serve Warm: These rolls are best enjoyed fresh from the oven or slightly warmed. If serving later, warm them back up for the most delightful experience.
Variations
There are many ways to adapt this recipe to suit your tastes or dietary needs. Here are a few suggestions:
-
Cheesy Garlic Bread Rolls: Add shredded mozzarella or parmesan cheese into the dough for a cheesy twist. You can also place a small piece of cheese inside each roll before shaping them.
-
Whole Wheat Version: Substitute some or all of the all-purpose flour with whole wheat flour for a heartier roll.
-
Herb Variations: Mix in different herbs like oregano or basil for more flavor. You could even create a blend of Italian herbs for a more Mediterranean flavor.
-
Spicy Garlic Rolls: If you enjoy a little heat, add crushed red pepper flakes to the dough for a spicy kick.
-
Garlic Parmesan Rolls: After baking, sprinkle some grated parmesan on top of the rolls while they are still warm to add a savory flavor.
FAQs
1. Can I use active dry yeast instead of instant yeast?
Yes, you can replace instant yeast with active dry yeast. Just remember to activate it in warm milk with sugar before mixing it into the dough. You might need to give it a little more time to rise.
2. How can I make these rolls vegan?
To make vegan Garlic Bread Rolls, substitute the unsalted butter with a plant-based butter and use non-dairy milk. You can also skip the egg wash and use almond or soy milk instead for the shine.
3. Can I prepare the dough ahead of time?
Yes, you can prepare the dough ahead of time and let it rise in the refrigerator overnight. Just remember to bring it back to room temperature for the second rise before baking.
4. What’s the best way to freeze these rolls?
To freeze, ensure the rolls are cooled completely, then wrap them individually in plastic wrap and place them in a zip-top freezer bag. Make sure to remove as much air as possible.
5. Can I add different toppings to these rolls?
Definitely! You can add toppings such as shredded cheese, fresh herbs, or spices before baking. Just consider how these might affect baking time and adjust as needed to ensure everything is perfectly cooked.
These garlic bread rolls are simple to make and offer a delightful flavor that enhances many dishes. Enjoy them fresh, experiment with different variations, and share them with family and friends to make meal times even more enjoyable. Happy baking!